Pictures

*** The pictures posted in this blog are my personal creations! I hope you enjoy! *** You can also follow me on FACEBOOK at www.facebook.com/forbakessake

Friday, April 29, 2011

We passed and now move on to Croissants next week!

Friday! We made it to the end of the week successfully.

Things are coming along nicely for us in class. We had our practical today and I had to make Turnover's.  I think we all thought these were the easier ones to do, but we got graded on them in great detail. I ended up getting a 94 which I was not too happy about. :( Boo, i did not have enough filling (blame my dad for that.. Grrrr) and also my shaping was off.  I will take his word for it ;) since he is the Chef and all...

Here are a few pics of him picking my product apart... :(


See picture #2??  Uh huh, that's the "you could have shaped these better" sad moment of mine... tearful, I tell ya...  You can see how I lean in that much closer, dumbfounded! laughing!! 

I can hear you already, an "A" is an "A".. but 94 and 100 are NOT the same! :) Enough with all that nonsense. :)   This was our last day of laminated doughs. I loved learning how to make these and I love knowing that everyone can buy the dough pre-made at a grocery store!  You know what that means right? Yes!! Jump up for puff pastry joy, you too can make these at home without all that manual labor! I know you want to ;) Come on now.. give in, dont by shy.  Sigh....

Next week we start making laminated yeast doughs which means we go back to fermenting the dough.  We will be making Croissants for 2 or 3 days and making them with different fillings. Please Lord, let him choose chocolate. What is a French Croissant if not with Chocolate??

There are only 2 weeks left in this class and then we are off to my specialty.. CAKES!! Have a fantastic weekend full of fun, family and ....more fun!

Ta Ta for now...

ME :)


Thursday, April 28, 2011

Palimers and Napoleon's

Where does the time go! It's Thursday already. Time is flying by and I don't 'likey'. We will be entering May next week! I'm not ready for May!! It's my family's birthday celebration month!  Don' think it's a bad thing. No, no, no... absolutely not! It means tons of get togethers and fun times, good food and crossing the fingers, BEACH days!  :) Ahh, too much to process... :) Let's focus on puff pastries.


We made Palimer's and Napoleon's today. Lots of sugar to put on top of our Butter! Seriously!! Can we say love handles?!?!?

We again used the rest of our dough from Monday to create these.  We first created the Palimers.  This is super simple to make. We used premade dough, so everyone can go out and make these! You take the dough and brush melted butter on it.  Follow that up with completely covering your buttered dough square with sugar:


Fold in both sides leaving about an inch open in the center. Brush butter on to each side and add more sugar, covering each side completely.

Fold them onto each other on each individual side, again, leaving the center open. Brush with butter a third time and put the sugar on top again. The sugar and the butter create the caramel that will melt and bring the dough together when baking.


At this point, you want to fold them together and  then wrap it and place it in the cooler before baking.


Cut these up a quarter inch in size with a Chef's knife and place on your cookie sheet. Bake them in the oven at about 375 degree's. Half way through the baking process you will need to flip these to the other side and let them finish baking.

They should come out slightly darker than mine:

We were running  a little low on time and these had to be taken out, but they still taste delicious and are extra crispy!

We then made the Napoleon's using the pastry cream we created yesterday. Each Napoleon requires 3 squares. Cut your dough into 2x4 squares and bake the squares off in the oven. You will flip these on to their other side in the oven as well.  Let them cool down and then place fondant on top of one of the squares. Pipe out pastry cream onto the perimeter of the other two squares.  You will top the two pastry cream squares on top of each other and then place the fondant covered square as your top, showcase piece.

I do not have pictures of the process because we were pressed for time at the end. :( But I took of picture of the finished product after the chef came by to check them out. He said my looked really good, I was happy because these take a little work, you can not overfill the center's and your fondant top has to be silky smooth with no flow over.


There you have it dolls.  These laminated doughs are super fun to bake.  I like them because they are time consuming. I know, that doesn't make sense to you but if you are in your own space, rolling out your dough, being precise with  your cuts and fillings.. its soothing and relaxing!  Put on your favorite music, have a glass of wine.. :) :)  Fun times! Anyhow, ok!! Some of you may not share that excitement with me ;) no problemo!

Tomorrow we have our 2nd and last practical.  He is going designate different shapes for us.  1/2 of the class will make Vol au Vants and the other half of the class will make Turnovers.  We each have to make 6 and show him our results! Wish me luck. I don't think it will be that difficult. We just have to make them look near perfect ;).

I hope you guys have a fabu evening.  My brother and his fiance are going to catch Usher in concert! Wooo Hooo.. sexy fun for an evening.  I will be here with Milo, the ever so faithful CockerSpaniel that does not leave my side. :)

Good night lovies!

Wednesday, April 27, 2011

Puff Pastry Vol Au Vents, Bouche's and Brie en Croute

Well, its not a French school for nutt'n :)  Thanks to the chef, I can actually pronounce these lovely names! Check them out in all of their splendor:
You have in the far right top corner, a wonderful bundle of deliciousness which is Brie en Croute... Brie cheese covered in dough, egg washed and baked for your appetizing pleasure. Middle to bottom left are those circles called Bouche's, they mean 'small bite', filled with a crab and shrimp filling. I left a few unfilled because these can be made savory or sweet :).  You know which I prefer.... :)  The diamond shaped puff pastries are Vol Au Vents, they are filled with lemon, blueberry and strawberry bakers jam.

To create the Brie en Croute, we cut the dough and wrapped and pleated it onto the Brie.  We took the extra dough and made little shapes to put on top. I of course, made the "sun" and "moon". :) You can kind of see them here, although its not the best picture. :)

I then created the Bouche's.  We cut the dough into spheres and then cut a center hole with a smaller cookie cutter into half of the original cut sphere's, creating the tops of your Bouche's . Egg wash the bottom of the sphere's and then place the cut  out sphere's on top. The egg wash will hold those together. You then want to egg wash the tops for color during baking.  It will look a little something like this:


The Vol au Vents are a little tricky, but once you understand how to create them, they are simple, you just have to make sure that your folds come out correctly and that all of your puff pastries are consistent in size. This is the first time I make these so mine are not consistent in size but they did come out kind of nice and nicely filled.  To create, cut your dough into 4x4 pieces.  Place them in front of you sideways so you have a diamond staring back at you. Yes, I said it, diamonds :) The best friend of many many a woman.  See, baking can be sparkly! :)  Ok... so anyhow, you want to fold the top down to create an upside down triangle.  You will cut the dough 1/4 of an inch on each side like this:

You can see the space you need to leave at the bottom tip of the triangle.  Open up the triangle and egg wash the edge of the inner square to look like this:


Fold in the left outer triangle so it sits on top of the inner right triangle.  Then flip the right outer triangle tip over to the left inner triangle so you create the Vol Au Vent shape.  Fill them with your choice of pastry cream or jam and they will look a little something like this:

Pretty!! Yes, those are lemon :) I cant help it!! I have to do it! I know I am the only one who likes lemon, but what do you want me to telly ya?!  What if the lemon runs out? What if I never see it again? Uh huh,see what I mean? :) These babies went off to my sister's and the kids.   I left a few here at my brother's house so that they can taste them as well. I need the feedback :)

It was a rush kind of day. We have 42 people and we are using dough that constantly needs to be in and out of the cooler. You also have 42 people needing to bake their products and pull them out of the ovens.  BUT, I am proud of all of us! We all work well together, RESPECTFULLY, and as a united front.  We get out of there on time every day and even have time to spare.  Its really cool to experience. I think we can all appreciate it.

Anyhow my darlings, tomorrow we make Napoleon from the rest of our dough! I can not wait! We made the pastry cream for it today. Layers and layers of yumminess. :)

I hope you guys are enjoying the pictures. I would love all of your feedback.  Thank you to all of you who read continuously. It makes my heart smile Big, big, big.

Muah!!

Until tomorrow....

Tuesday, April 26, 2011

Puff Pastry Completion in Pithivier & Turnover Forms...

Hello everyone!

Terrific Tuesday :) This was our creation today. The center Puff Pastry is a Pithivier Almond Cream Puff Pastry and the side pastries are jam filled turnovers. Day two on this project and it went awesome! These taste amazing! I have never been a fan of puff pastry, but I am a fan of these.  Even better, the Chef brought out Lemon cream for our turnovers! My oh my, that is a dream come true. I absolutely adore anything LEMONY :) Have not had anything sweet with lemon in such a long time.  I know, I know, "lemony"  may not be a word, but its MY favorite word. :) Since I am not the only one tasting these little devil's I made some with Strawberry and Blueberries as well.  Fun Fun day.....

To start, we took the dough created yesterday out of the cooler and used 1/3 of it!  We rolled that out 1/4 inch thick and pulled out two 10" circles and 8 squares. The two circles were for the Pithivier and the squares were for the turnovers. The dough has to be cold to cut these out. Remember, they are made with butter and once butter gets warm, your dough gets soft and gooey.


Once you roll out and cut your shapes, you then begin to create them.  You take your first circle and you place your Almond Cream right in the middle of it. You then egg wash around the cream on top of the dough.  Place your second sphere on top and gently press the two doughs together. The egg wash is what will hold it in place. You will then create a shape like a flower around the edges, score the center  with a whimsical shape and egg wash the entire top and sides as I did here:


With the turnovers, you will place them in front of you slightly angled so it looks like a diamond instead of a square.. mentally cut it in half and place some jam of choice on the middle of the bottom half.  Egg wash the sides around the jam and gently bring over the other half so you have a perfect triangle.  You will use a fork to press it around the sides, egg wash and create a small vent with scissors, right in the center as seen here:


Bake these babies until they are golden brown and cool them. This will be your result:


I ate TWO lemon turnovers while they were nice and warm... You know how I am :) First of all, I cant wait.. and secondly, I like my baked goods warm! BIG SMILE!

Here is the recipe for those of you who have LOTS AND LOTS of time to do this! It is very time consuming, but if you have the patience and the tools to create it, a mixer, :) you will have a happy audience to share with. I love baking! I would make this at home any day! I do hope you give it a shot!

Puff Pastry

3 lbs 12 oz of BREAD FLOUR
.75 oz of SALT
2 lbs 2 oz of WATER

Pack

3 lbs of BUTTER ( soft, room temperature)
6 oz BREAD FLOUR

Create both of those separately. You will need a mixer for the Puff Pastry, mixing for just a few minutes on the 1st level,  and you can use your hands to create the Pack. Do not overwork the dough because if you go to my blog from yesterday, you will see that you continue to work the dough as you roll out and fold.. 4 times, letting it cool in the refrigerator 15 minutes in between each fold. :)  Pop in those Sex and the City CD's because you will need some entertainment. :)

Almond Cream

3 oz of BUTTER
3 oz of SUGAR
1 EGG
VANILLA to taste
3 oz of ALMOND FLOUR
1 oz of CAKE FLOUR

Create this with your hands as well.

Again, if you make this, I am here for you!! Be patient with it, it will be well worth it!  This is a delicate dough and the presentation is key. Take your time and do it right... ooh!!! That was an old school jam!! I wont break into song to spare you the corniness.

Ok my darlings! Enjoy your night! Tomorrow we do two different shapes and will be filling them with cheese and other yummy fun flavors.

Good night!


Monday, April 25, 2011

A Puff Pastry and Almond Cream kind of Monday

Hello Everyone!

Welcome back from the long weekend. I hope you had a great Easter.  I spent the entire weekend at the beach and loved every second of it :) 

We had our first test today covering the first 3 weeks of bread. I got a 100% .  Yipee!  Very exciting. I'm trying to get us that 3rd "A". ;)

Sorry this is so late. I was having some Internet issues. But here we are! We created puff pastry today and boy oh boy, it is SO true. We are going to gain some mega weight in the next 3 weeks. Tee Hee.  We created the dough for the Puff Pastry and as that sat for a bit, we created the pack which goes inside the puff pastry. The pack consists of 3 POUNDS OF BUTTER! O...M...G... (as everyone says in today's world!)  3 lbs!?! Sheesh... what is a girl to do?  Yup, continue on to making it! haha...

Puff Pastry takes quite some time to make. What we made today should take you about an hour to do.  Once you have created the pack, which is butter mixed in with bread flour, you then roll out your pastry dough in a rectangular shape, big enough to fold in thirds. Here is mine:


You can see it takes up a big part of the table. :)  You then want to take the Butter Pack you created and spread it across the first 2/3rds of the dough, like this:

Make sure to leave at least an inch of space around the perimeter so the butter does not come out once you start to tri-fold the dough.  You will bring the right side of your dough over onto the pack in thirds and then bring the left side of the dough over as well.  It will then look like this:

Place your creation into the cooler for 15 minutes and refold out and put back into the same form, the tri-folds. You will place it back into the cooler for 15 minutes and repeat two more times for a total of 4 folds.

This is as far as we got today! We also created the Almond Cream that we are going to put into the pastries. That is also sitting in the cooler until tomorrow. :)

Tomorrow we will learn how to cut the dough into two different shapes. We will be using this same dough throughout the week to create other different shapes as well with different fillings. I will make sure to take pictures for you! It is a time consuming product. I do hope that it tastes delicious :) :) But its a pastry, so I am sure it will ;)

I hope you have a beautiful week and I will see you back here tomorrow!

Take good care,

Linda

Thursday, April 21, 2011

We got a 96% today lovies!

Here are the breads that I made for my practical. They came out quite lovely and shiny.

We have made it to the end of week three everyone. Very exciting. I absolutely LOVED every single day of these past 3 weeks. The breads came out delicious and I am really proud of myslef. I honestly think I can do this with my eyes closed. :)  Although, I may just keep one eye open, cuz you just never know. We don't need any accidents ;).

So yes, we received a 96! We did it! I was super nervous going into it this morning. Everyone from the last practical said he made them VERY nervous.  He is a tough cookie but it's what I like the most.  He pushes us and expects us to do better than we think we can do.  I just got in there, did the 12 steps in my head and took it nice and easy as there was no rush.  I actually calmed down because he had the beach report on the TV so I could see the waves in Cocoa Beach.  BIG SMILE!  I mean, hello! Does he know I love the ocean?!!? It was perfect!   Soon after, he started talking to me about the surf! At this point the nerves were completely gone.  Thank you Chefy!!  You just do not know what you did for me today.   So yea, it was smooth sailing for the rest of the procedures. I  just kept looking up... nice waves too! Note to everyone.. Cocoa has waves and there is actually some kind of long board competition going on. Just in case you want to go. :) 
My friend Lulu took this picture of me getting my breads out of the oven:
Thank you LuLu! She also got an "A". We've worked together in the same group these past weeks. :)  AND, this is the chef grading my product:


Here he is telling me that I didn't press the bottoms of  my braids hard enough. :( I had a little tunneling inside my bread as well, so now you know where the 4 points went. Boo Hoo...

You can get a feel of what the class looks like for breads. All the tables are the same, all made of wood.  We all use that one oven that you see behind me in the picture where I am pulling out the bread. We have worked in groups of 4 and I believe he told us today that we will be working alone for the next 3 weeks since we are doing laminated doughs. Um, yea, we may be gaining a little weight together these next 3 weeks my darlings. But have no fear, I will totally be your cheerleader while you are working out ;).  I wont let us lose our figures! Not even for the love of pastries!

That is it for me. We have a mega test come Monday so I will be studying... beach side of course. If you wan to find me, just roll up to Cocoa.. I will be there :)

Enjoy your Easter weekend everyone! Remember tomorrow is Good Friday. Eat Fish! :) :) I lovey fish.. Snapper to be exact. Ok, fine, I love Tuna too.. yummy, Sashimi style. Ooohhh I miss certain things in my life.. but its all good! There is better to come!

I will see you guys back here on Monday! Enjoy, be safe and have some fun! Im off to go get my nails done! Hot Pink ALL THE WAY! Whoo hooo!!!

XO


Wednesday, April 20, 2011

Pretzels and Bagels and recipe's oh my!!

Pretzels with Salt .....


And pretzels with cinnamon and sugar..... 


Yes, you already know which one is the chef's. ;) Look, when it comes to shaping,  me no likey!! :) :) Granted, I am not giving it 100% when I know I should.. but at least I get the idea.  I won't lie, I understand how to make bread, it comes out darn good, but I am really much more into baking pastries. I will be much happier and excited in my cakes class :).  Less shaping ;).  I better get this shaping thing down tomorrow though because my practical is on the braided Challah bread!! I actually enjoyed making that, so I'm crossing my fingers that I will do well.

So pretzels are mega easy to make and they come out soo good. If you own a mixer that has the kneading attachment, you should definitely give it the old college try. I am always around to help you with the 12 steps, so just give me a shout. Here is the recipe :

Ingredients:

10.5 oz of WATER
.25 oz of Instant YEAST
12 oz of BREAD FLOUR
4 oz of PASTRY FLOUR
.25 oz SALT
.50 oz SUGAR

Soda Wash  ( Make separately and put aside )

8 oz WARM WATER
1 oz BAKING SODA

Make the dough using your 12 steps!  Mix this all in your bowl, let your dough sit, etc.  :) After you proof it and are about to put it in the oven, you need to brush on a soda wash so it gets a nice color while baking. If you want to use Salt, now is the time to put it on the bagel. If you want to use cinnamon and sugar as your topping, wait for the pretzels to be done, put some butter on the top as soon as it comes out and spread your cinnamon and sugar mix on top of the pretzel.  It will look a little something like mine above. Of course, if you shape your bagel super pretty, it will come out cuter than the one you see above ;).

Remember, your oven should be at 400F. When its Golden Brown and Delicious, pop that baby out!

PLAIN BAGELS:

Bagels are also super duper easy to make and they taste delicious right out of the oven. You know what? I don't think I will ever eat cold bread again. ( Riiiiiiight!)... ok fine, that's stretching it a bit. But I REALLY, TRULY, LOVINGLY enjoy the bread warm. Mmmm Mmmm Good!! I don't even look at it after its cold. I shun the poor things. haha... Oh boy.. I know, that's just wrong.  Better for my "tasters", cuz that means more bread for them.

Wish me luck tomorrow! As soon as that practical is over, i will be free!! BEACH free!! Beach, Beach and more Beach.. Beach on Friday with the besty, Beach on Saturday with the family, and well, I wouldn't mind being on the Beach on Sunday too, but somehow I think I will knock out Sunday and enjoy the Easter holiday with my family.

I will see you back here tomorrow to give you OUR grade and the pics of our final product. Enjoy the night, its breathtakingly beautiful out!

XO


Tuesday, April 19, 2011

Mouth watering Soft Rolls and Focaccia Bread

These, as my buddy Graham stated, are THE MOST delicious rolls we have ever tasted :).. Tee hee.. Ok fine, the most delicious rolls we have ever made ;).

We had a hell of a day today. We messed up on our scaling with the Focaccia bread and had to do it over.  This is a FIRST for our group.  We got it right the second time though.... ;)  While the Focaccia was in the mixer, we began scaling our soft dough ingredients. The stars were not aligned for us this morning as that dough also did not mix correctly. Seriously?? Two out of two? There are 4 of us!?  How does that happen? I know we are pretty fast and steady, but up until now, we have been smooth sailing. :) No matter! The second time around on the soft dough was perfect and we had a fun time shaping.

So yea, the day started off a little tight. The Focaccia is a bread that requires a lot of fermenting and proofing. So that sat on the counter while we created the soft dough, rolled, cut, second scaled and shaped it!  We made knots today! A single knot and a double knot. I had the hardest time getting this. It literally took every person in my group to show me.  I have not been all together with it this week. I'm having a rough start and for sure looks like I will have the same ending. I'm grateful that there is no school Friday as I really need the get away. You know where I will be.. think sand. ;) I'm not leaving until dark either!

Woops, back to bread we go.  Here is our Focaccia bread right after coming out of the oven. When you place this bread on your sheet, it has to be saturated with olive oil.  As soon as it is out of proofing, you then smother more olive oil on the top and then use your two fingers to create holes on the entire bread. We made ours with herbs and cheese. It tastes amazing.  I am not going to lie, I don't care to have more than just a few pieces of bread anymore. What kind of class is this for ones figure!!! :) :) :)  Sheesh! Bring on the pounds.


You can make breads in all kinds of shapes. For the Focaccia, we didnt do much of an artisan shape.  This my friend, as you can plainly see, is a square. Ha! Yea.. .moving right along. These little babies below came out cute though. You can see a few of our double and single knot shapes. I pray that he doesn't make this one of our practicals because honestly, the whole knot thing.. yea, not for me. Knots, of any kind, don't seem to be my thing.


I really hate to cut the blog short but I have absolutely no energy!! I'm so sorry! I will definitely come back and give you the recipe's if you want them. They are delicious, super soft and i am sure with some butter, to die for!

I need to go knock out for a few ;) See you back here tomorrow for pretzels and bagels! Come Thursday, I will be doing my practical. Cross those fingers... I better be well rested by then! No one likes a grumpy ;)

XO


Monday, April 18, 2011

Challah Bread with recipe :)

Hello Monday! How was yours??? Mine was.. ehhh.. it wasn't all that. It started off wrong, continued to go wrong and then I just had to make the best of it. BUT, I got myself on track and watched the Chef's demo and was ready as ever to make more bread :) Nothing puts a smile on your face like the smell of fresh bread. It really is the little things that count!
These are the chef's demo Challa breads.  :) They look so beautiful. We sure did try our best to mimic these and we came somewhat close.  Challah is the traditional Sabbath bread for the Jewish community. You create three separate doughs and then you roll them out to long, baguette style, shapes.  You then connect the three at the top by pressing them together and braid them, finishing them off at the end with the same pressing of the dough. Here is what the dough will look like after you have braided and sealed:


As we learned today, the three separate strands stand for TRUTH, PEACE and JUSTICE. It's great to see that way back when, there was a beautiful meaning brought into the art of baking.  I didn't know each strand stood for something!   Challah is a sweet bread that is flavored with honey, sugar, egg and butter. We did not use butter in our bread, we used oil instead. The dough was great to work with. It wasn't too sticky. Boy oh boy, when that dough is sticky, and you are a rookie like me who forgets to put flour on her hands before rolling and shaping, it creates a bit of a frustrating mess. :) Tee Hee... See, I keep learning as I go along. Here are our breads! Arnt they just SO cute!! Love them! Mine is the one in the middle. And it ain't no monkey ;)  Sigh!!!


If you want to try this one out, here is the recipe!! Enjoy! Enjoy!

Ingredients:

1 lb of WATER
.50 oz of INSTANT YEAST
2 lbs 8 oz of BREAD FLOUR
8 oz of EGG YOLK ( in carton is perfect)
3 oz of SUGAR
.50 oz of HONEY
1.0 or less of SALT
4 oz of VEGETABLE OIL

Throw all those babies into your mixer, making sure that the salt does not come into direct contact with the yeast. Please go back to my previous blogs for the 12 steps to make this one correctly. Remember to add the oil last as the dough will absorb the odors quite quickly.  This makes 4 loaves or 12 strands. :)

The bread is delicious!! It is actually more delicious to me nice and warm and yummy!! BUT, I wanted to bring it home looking beautiful for my parents... sooo I held off. :)

Ok my sweets! Tomorrow we are making a soft dough in knot shapes and also going to make that Focaccia we have been waiting for. I have a practical to take on Thursday and am totally crossing all my fingers and toes that I do things right. He is hard on us when it comes to practicals, but its better to learn how to do things right the first time around so you can continue using those methods later in life. So I appreciate it but that doesn't mean I'm not scared! :)

Have an amazing night and look forward to hearing from you!! Off I go to practice, practice, practice.

XO

Friday, April 15, 2011

Enjoy the weekend baking bread :)

Hello hello! Happy Friday everyone!

Today was a quiet day.  We spent our day in the library writing reports on different kinds of breads so there is not much to inform on today! I wrote mine on Beignets. Yummy, they are like little small doughnuts without the hole ;) Sprinkled with powdered sugar. Deeeelicious. I had the best beignets in California at the Beachcomber at Crystal Cove. If you ever visit, its right there by Laguna Beach so you should definitely go.

I do hope everyone has a beautiful weekend! We will be making Focaccia bread on Monday and a few other breads during the week and then off we go to make danishes the week after.

I am volunteering tomorrow for an event that is going on at Le Cordon Bleu so my weekend will not start until Sunday!

Enjoy! Go to the beach :) Send me pics.

XO

Thursday, April 14, 2011

Pain de Campagne - Country-Style Bread

Do not be shocked... but yes, we made more bread today.  :)  :)  :)  May I present you my final product:


Today's bread was Country Style Bread. It was an Artisan Bread day so we had the choice of shaping these and scoring them in all different kinds of ways.  You could do your classic 3 scores, or you could do X's or Checkers or circles... squares. Whichever you wanted.  It was neat to see the chef make the different scores.  Below are his shapes. He created a Boule with a swirl score and the Batard with the X scores: 


The final product smelled heavenly of course and when I got it home and cut it, it was so very soft and yummy. I stopped by the store because I was going to create a mango chutney spread, but I am not going to lie, I got lazy.  Dear Kraft Philadelphia- Honey and Nut- Cream Cheese Spread, how do I love thee??.. let me count the ways!! Yuuuummm!! I had a craving for Cream Cheese, what do you want me to tell ya? A girl can only go so long without spreading it on the bread. :)

I know, you want to see my final creations don't ya?  Ok, fine... here we are:


Mine is the back bottom batard that you can't even see in this pic! :) My partner did the other two. Good thing too, because she was chosen as one of the 24 that will be doing the practical tomorrow. I will do mine next Thursday.  Our hunch that he would choose the batard shape was true, so we all decided to practice it.
Shall we ask the same question here as we did yesterday?  Of course! :)  Do any of these look like FOOTBALLS?!?!? Uuugghhh, I mean seriously!! How hard is it? Roll the dough out, come up and over, bring the two sides up and over. (in the shape of a smiley face)  Bring the middle up one more time, bring the sides up and over and finish rolling it on its bottom.. That's it folks... You think we could get it right? 
NOPE!

 Off I go to practice... It's a library day tomorrow for the rest of us. We need to write about the history of bread. I'm sneaking my play dough in there!

Have a  nice night everyone! The weekend is almost here and I have a busy one!

XO

Wednesday, April 13, 2011

Whole Wheat Bread in Epi and Fougasse shapes

How was your Wednesday?? Mine was super fun. I had an awesome time in class today :)  We made more bread, and as I mentioned before, there's nothing like the smell of bread baking in the oven. :) :)  Here is the result of my day:

I'm sorry these pictures do not have more color. Bread isn't the brightest color in the box!  I will make up for it! 

We were supposed to make 100% Whole Wheat bread today but unfortunately the ingredients that were brought in were not the correct ones.  We made Italian Wheat bread instead. What is the difference? We used emulsified Wheat instead of 100% Whole Wheat. The result? Deliciousness melting in your mouth :)  I'm not too picky when it comes to bread. I like it hot, hot and hot with butter, butter and any kind of butter! :)  I have already been reprimanded by the Chef , he made it very clear that bread CAN NOT be cut warm. :( Boo... I am truly sorry chef, but for me, hot bread is bread that is going to be cut, smothered in butter and placed in my mouth. I know, detention for me! Bring it on!! :)  Just let me take the bread with me! Here is the recipe for you!

Ingredients for Italian Wheat Bread

1 lb and 1 oz of Water
1/4 oz of Instant Yeast
1 lb of Bread Flour
12 oz of Wheat Flour
1/2 oz of Salt
1/4 oz of honey

The recipe will make 4 creations of your choice.  :) We created two shapes today, Epi and Fougasse. Epi literally looks like the wheat stem and the Fougasse has the shape of a silver dollar or you can play around with the shapes to where it looks like a leaf with cut out veins? I dunno... just saying. ;)  To create the Epi, you roll it like you would a baguette, and then you take your scissors and cut it at a 45 degree angle as many times as you would like. I cut mine 8 times.  This is what it looks like cut up:

You then take and alternate the pieces, separating them from one side to the other. Once you do that, you will lay it on your sheet pan and let it ferment.  This is the shape going into the oven and the shape that will come out once your bread is done:

The Fougasse is rolled out in a round shape and then you slit the dough with your razor blade 5 or 7 times. ( or however many you would like to cut) This is where you can get creative. Yes, this is where I lack creativity ;).  I will stick with Classic cuts.  Here is what they look like before going into the oven after the slits are stretched out:

And here is what our "babies" looked like after we waited for them to come out of the oven! Man they made us wait a while. It was worth it though!  We didn't quite get the color the chef wanted, because he constantly asks us to get GOLDEN BROWN AND DELICIOUS... this is golden ... BEIGE but Delicious? Does that count? laughing.. it better!!


The Chef made some Honey Butter that I thoroughly enjoyed on my HOT Bread... .shhhh :) :) It was just soo good. He just whipped together butter and honey. I love honey. I love bread. Like I said, it was a GOOD day.

I hope you take a look at this and make it in your mixer! It's an easy bread to make and a fun one to play around with.  I would definitely create an oil and vinegar dip for this one as well.

I hope you learned a little something new, and if not, I will continue learning for you! Tomorrow we create  Country Style Bread. :)

Enjoy your amazing night. I am going to catch up on some reading and maybe even watch a little movie. I rented THE FIGHTER... not sure if anyone has seen it. A few people told me they enjoyed it so I'm going to check it out and relax the mind.  Too much in the brain creates unnecessary chaos!

We have our first practical Friday!! Surprisingly, I am not nervous, I just want to make sure my scoring and shaping are good.  He is alternating who does their practical this Friday because we have too many people in class. So some of us will have it this Friday and the rest will have it two Friday's from now since the following Friday is GOOD FRIDAY and we do not have class.  I hope I have mine this Friday!!

Goodnight and see you tomorrow!!

XO

Tuesday, April 12, 2011

Good old fashioned Pumpernickel bread :)

Yea ok.. I really don't know if its old fashioned or not. All i know is that I have never tasted it or seen it before.  :)  BUT,  it's name is pretty fun to say three times in a row real fast :)  

I made the loaf in the middle. Now let us ask ourselves this.....do these babies look like footballs to you?  Absolutely not! That  means we shaped them wrong :( Yup, wrong, wrong wrong. And how do I plan on correcting this problem you may ask?  The dollar Store, as I stroll over to purchase their $1 play dough. That's right. I am going to practice rolling this BATARD over and over and over again until I get it just right.  And lets take another quick glance at my bread and look at my scoring... uh huh..do those look like scoring to you or just 3 big blow out holes?  Exactly!! I need to practice scoring too!! Now, now. I am not being hard on myself as most of you are thinking right now. I am just being honest! Don't roll your eyes at me Cindy... Ginnette. I see you! ;)

All silliness aside, this was a cool project. We were able to work together with another group. One of us made the Rye Pumpernickel bread with caramel as an ingredient and the other group made it without. My group made the one with caramel which gives the bread that rich brown in color. The recipe made 8 loaves so they kindly forked over 4 of their dough balls and we did the same. :)  When it was time to roll out the dough and form the shape of the batard, we placed one dough on top of the other in order to create a swirl effect inside.  This is what it looked like prior to starting the roll out and shaping:


Pumpernickel bread is made with a dark rye which means it is richer in earthly flavors and heavier than white or medium rye. You can see in the below cuts, that the Pumpernickel has whole grains in it. You don't want to over mix this dough so you don't break those up. Ok, I take it back. You cant see the whole grains in the picture! Laughing... well what can I say? I tried. You can take my word for it that the whole grains are in there though! :)


This type of sourdough bread requires a Rye Starter. We created that yesterday and let it ferment over night.  Our Whole Wheat Bread that we are making tomorrow also requires the Rye Starter so more was created today. I know what you are asking. What is the purpose of a Starter, and in this case, the Rye Starter? Let me give you a quick history lesson! laughing... yea right, as if I had that much knowledge. Let me tell you what the Chef told us. :)  Before yeast was available, bread was started by mixing flour and water together and letting it stand until wild yeast began to ferment it. It was then used to leaven the bread.  Since we are not in the cavemen era any longer ( thank GOODNESS!!) we now create the starter ourselves and  use it to leaven our bread. I hope that helped to clear it up. I know it helped me! :-) I hope I don't miss that question on the test ;).

So there you have it. Pumpernickel in all its greatness. I hope your week is starting out lovely. I will catch you back here tomorrow!

Enjoy your evening everyone.


Monday, April 11, 2011

Let's make Pizza!

Happy Monday everyone!  Can we say it is H - O - T ??  It is as hot outside as it was in the kitchen today making pizza's. :)  I hope you had a nice weekend. Of course it flew by way too quickly.

We got right into it this morning with a demo on how to make the pizza dough. Same 12 steps again.  If you want to give it a shot and you have a mixer, here is the recipe:

Water                 17 oz
Instant Yeast        .25oz
Bread Flour        1 lb 12 oz
Malt Syrup          .25 oz  ( we substituted honey)
Olive oil               .75 oz
Sugar                   .25 oz

Place all your ingredients into the mixer. Remember to make sure not to have the yeast come into direct contact with the salt. In this recipe, you also want to make sure to put the olive oil in LAST.  Start the mixer on its 1st speed and let it mix for TWO minutes. Scrape down your bowl and then mix it at your next speed for 4-6 minutes. You want to check your dough's elasticity after 4 minutes.  If you think its not elastic enough, mix for another minute. Make sure you do not over mix as you are creating gluten when mixing and you want to control it.

Once you feel your "baby" is done, as my group calls our dough, :) take it out of the mixer and place it on the counter and cover with saran wrap for the first fermentation process. This is where you eat your Snickers bar or chat with the girls :).  Once your dough has doubled in size, fold and pound your dough and then cut your dough into two batches so you can make 2 pizza's. We second scaled ours and got 5 equal batches out of this recipe and made personal pizza's.  

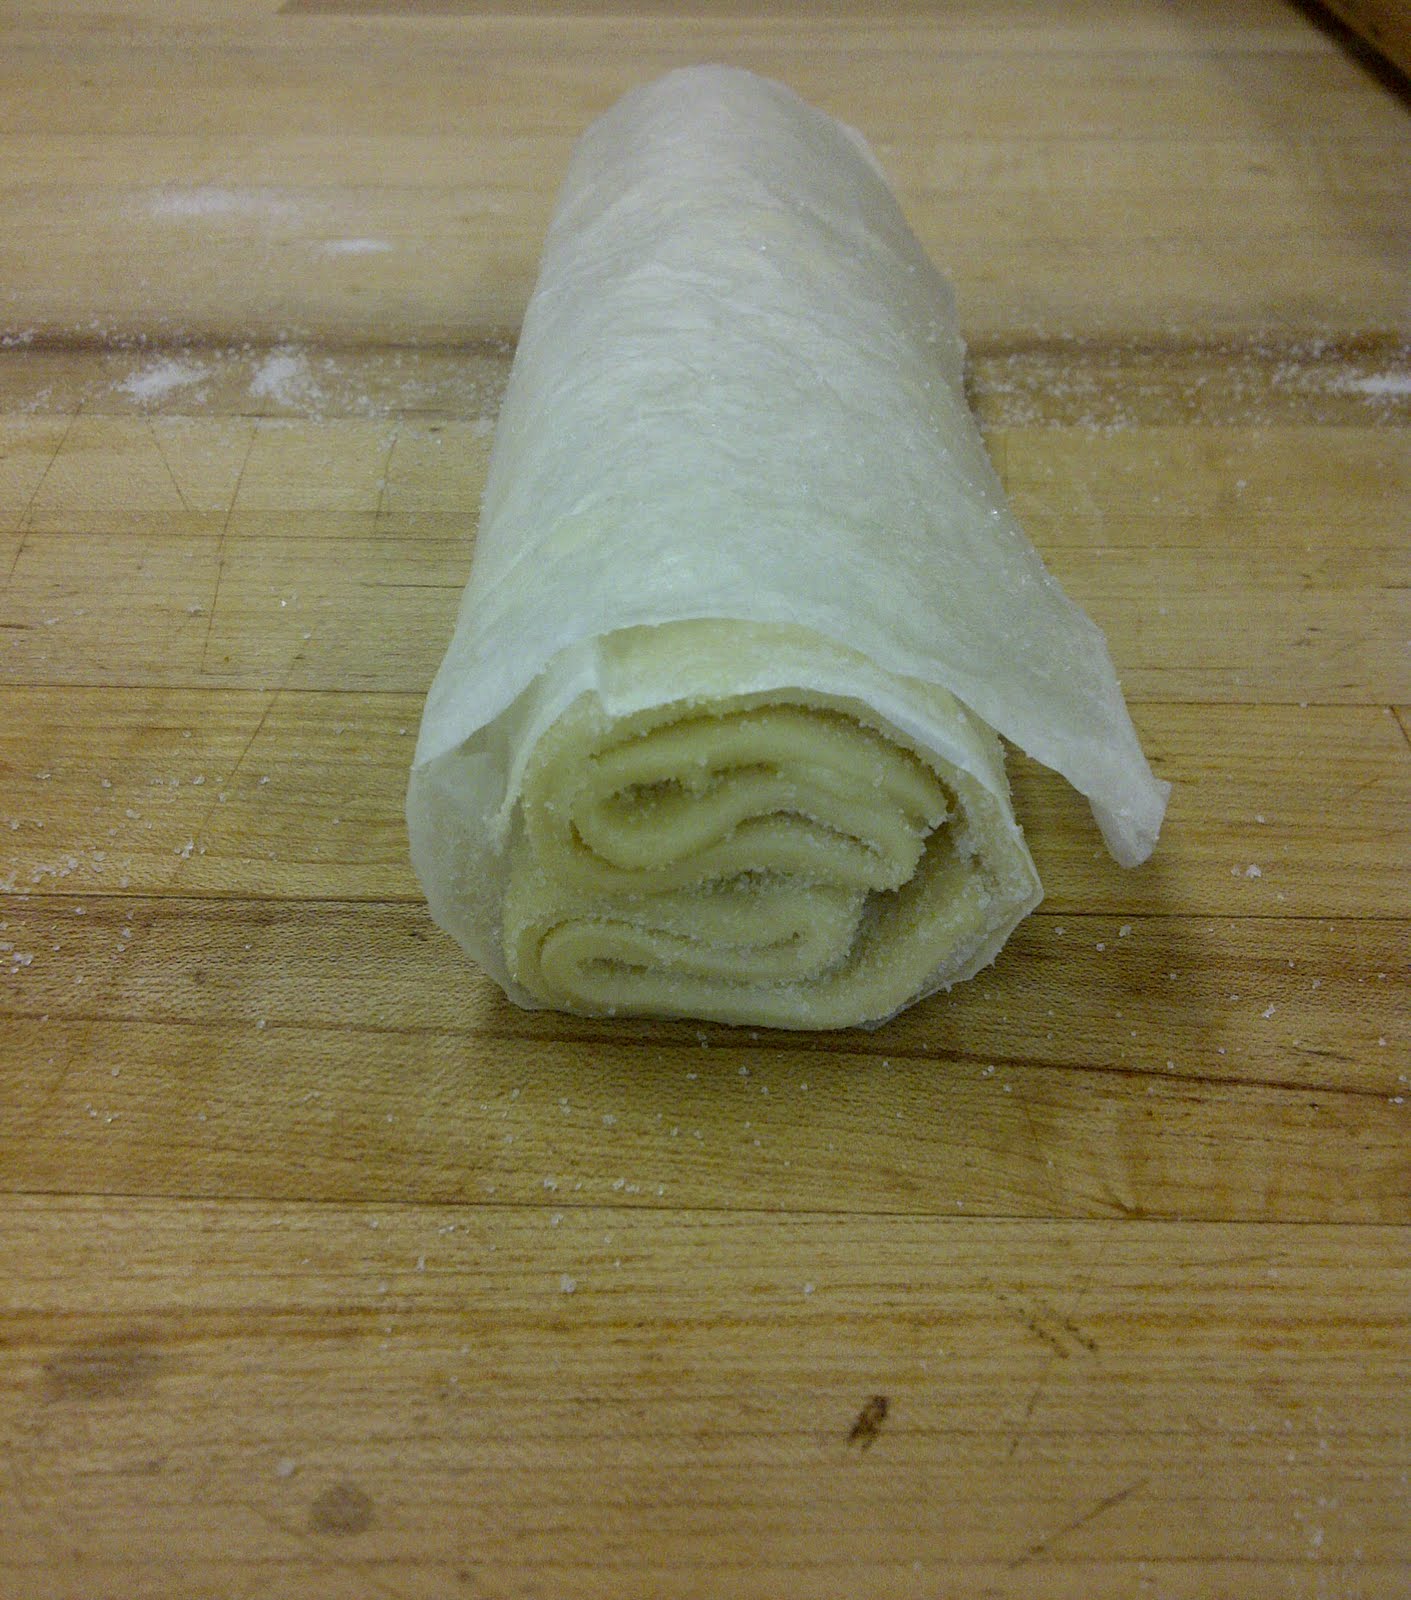
Round your babies by creating your dough balls, squeezing out the air as you roll and shape them. Once they are all rolled out smoothly, like that of a babies bottom, cover them with the same saran wrap for 5 minutes.  When the time is up, roll out your pizza doughs into discs, ensuring to take out the air as you roll. Stretch your dough's out by using both hands and stretching the outer circles and squeezing.    Place Semonila flour onto your baking sheet pan, place your dough on top and dock your dough. This is an instrument that creates holes into the dough. It has a lot of spikes on it and you roll it on top of your dough. Doing this ensures no air bubbles forming when you bake the pizza. :)  you are now ready to start creating your pizza's. :)

Here is a picture of our chef placing sauce onto the rolled and docked pizza dough at demo:

The spiky tool you see next to the sauce can is what we  used to dock (create holes) on to the pizza dough. At this point you can put anything you want onto the dough. I first placed my sauce, and I was not shy. I love extra sauce on my pizza! If it was up to me, I would skip the cheese :) :) But today, I used mozzarella cheese and added on pepperoni, fresh yummy amazing basil, green peppers and red peppers.  Here is my before picture:

Ta da!! I was my own crowd going wild!! Yes, this is my first time making pizza :) 

We then want to place our pizza in the cooler for about 5 minutes.  This is where you take another mini break and drink some water. The kitchen gets hot with 42 people in it and ovens at full on heat!  Take your creation out of the cooler and place it in the oven on your pizza stone at 400 degrees F. Bake until you see the crust and ingredients are to your liking.  Here is my silly little guy:


There you have it! Pizza making broken down simply for you.I think I did good! Now I just need to come up with a sexy Italian baking name, in case I ever try to make this again. Yes?? No??? Anyone??  Fine! 

My little baby would have looked cuter but I like sauce and apparently I didn't put enough mozzarella in the beginning so I added some at the end and my pretty colors disappeared :(.  But you get the gist of it. :) It still tasted delicious!

The fun didn't end there though. We also made Pita's today.  :) I love Hummus with Pita and now I am craving it!  Nothing a run to the store cant fix, except I'm kind of tired and getting into my car isn't an option.  Especially since gas is $3.80!!!  Hello? America? Obama? Where are you? 

Sorry, back to baking.  Good Hummus is hard to come by, especially if you have been to the Middle East and tasted THEIR hummus. I died and went to heaven during my trip to Jordan. I went with my handsome better half and our first breakfast consisted of ridiculously AMAZING  hummus and fresh pita. I could have eaten it morning, noon and night.  Ahh I do miss that place. Some of my best memories are from there. Oh shoot! Sorry, I was going off on a tangent again. I think its time for me to sign off!

Not before you see our babies though :)

Arnt they just darlings?!  :) I barely want to eat them, well, until I get hungry of course. ;)

We make Pumpernickel tomorrow! I do not think I have ever tasted that before so I am curious.  We will work in two groups tomorrow because we are going to make a swirl. Fun! Love Swirls. Reminds me of my Icebox Cookies. :) Looove Cookies!!

If you have any questions, please let me know! Today's pizza party was really fun and I enjoyed it thoroughly.

I will see you here tomorrow I hope! Enjoy your evening!

Ta Ta for now...